You have the ability for Sub Accounts that can be linked back to a Master Account, which handles all the processing and payments for all accounts.
Basically it works as each employee can have an account with a business, but they don’t make any payments and all payments and control comes from the Master Account.
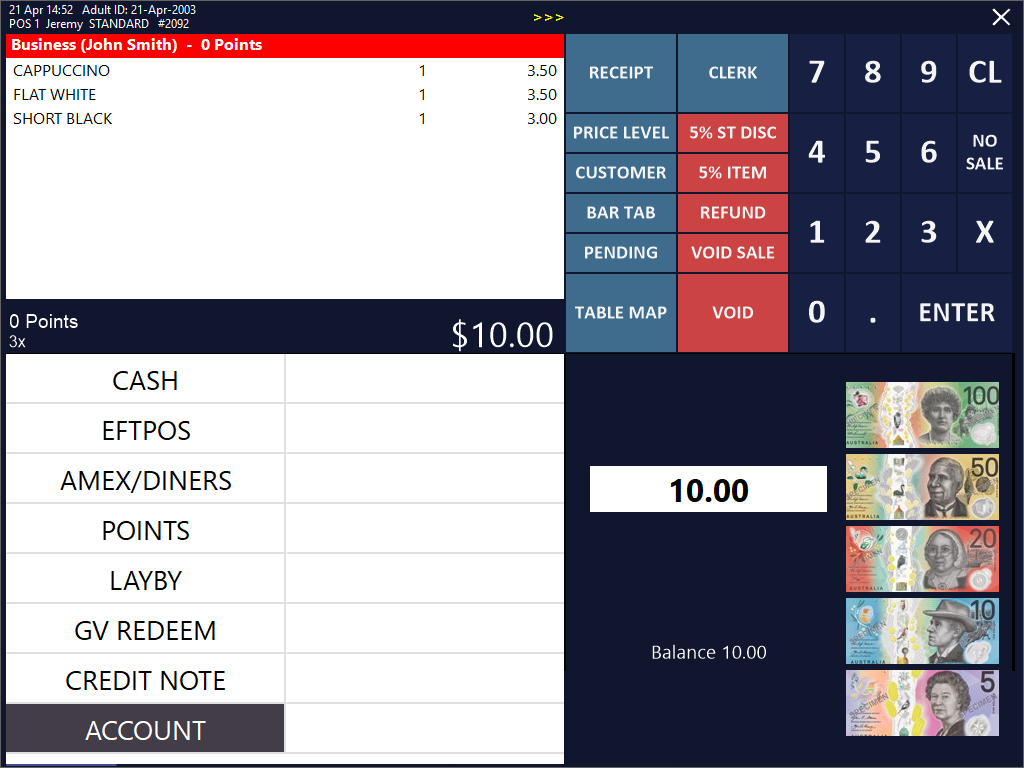
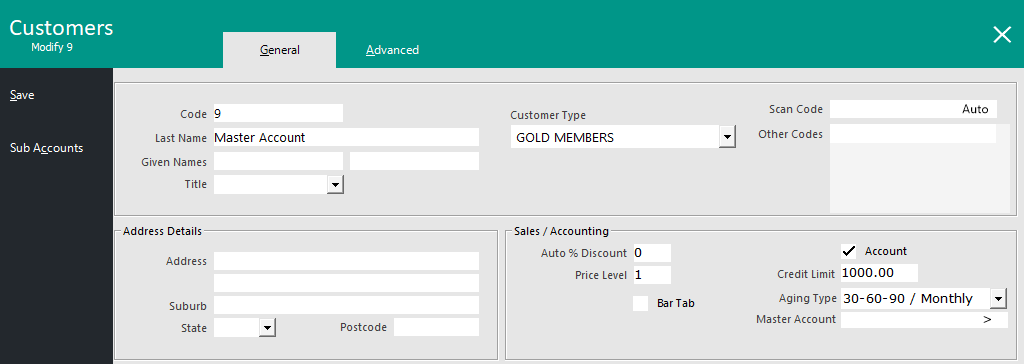
Go to File > Customers > Customers > Add > Create a Master Account > Select ‘Account’.
You do not have to do anything special to create a Master Account.
It is a good idea to fill in the Company field name.
The Master Account will control the Credit Limit of all accounts.
Sub Accounts cannot enter their own personal credit limit.
If the Master Account’s credit limit is set to ‘0.00’, this will allow an unlimited amount of charges to be made by the Sub Accounts.
If the Credit Limit on the Master Account has been set to $500, each Sub Account will share the $500 limit until it is reached.
There is no way to limit a value to a specific Credit Limit to each Sub Account.

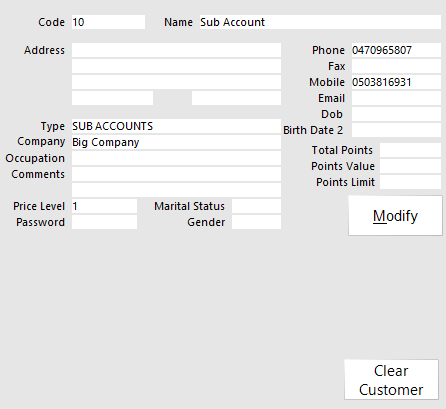
Create a Sub Account for each person and link them to the Master Account.
There is no limit to the amount of Customers that can be linked to a Master Account.
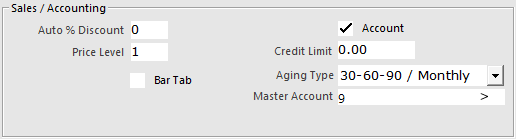
The Credit Limit field will not be available when linked to a Master Account.
Go to File > Customers > Customers > Add/Modify > Sales/Accounting > Master Account.
Sub Accounts cannot access standard customer account buttons on the Customer screen.
All buttons on the POS Screen will be disabled for this account.
Sub Accounts will also be disabled from using buttons that have been programmed on the POS Screen.

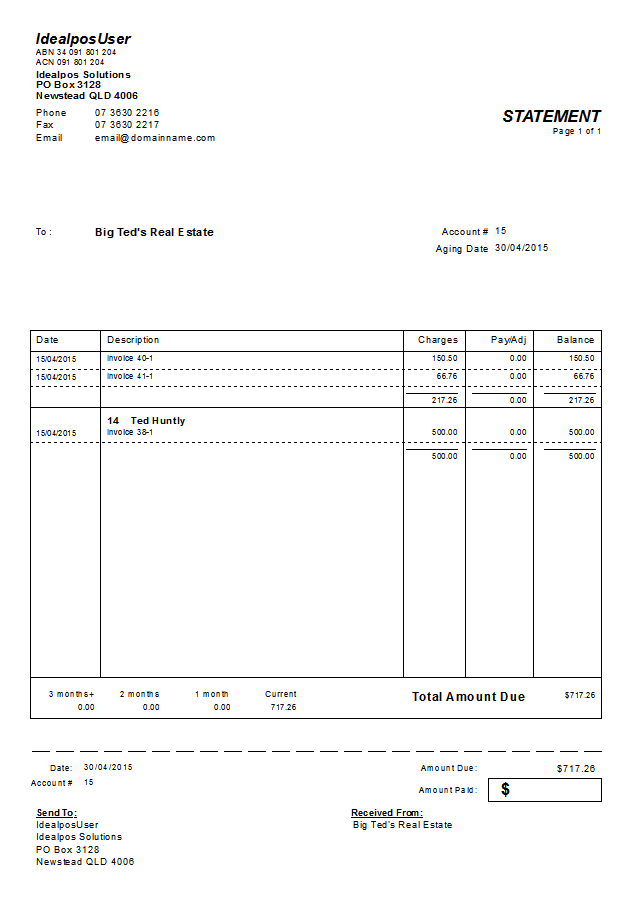
When you run a Customer Statement Report for the Master Account, it will include all invoices for the Sub Account.
It is also possible to use Master/Sub accounts for a single customer only, but for attributing different purchase transactions to different reasons within the business.
Managers could, for example, have a personal sub account for their own purchases, but also have a business sub account to charge purchases when showing clients through the premises.
Go to Setup > Yes/No Options > Customers > Select: Master Accounts used as Lookup for Sub Accounts.

This option will remove the normal features of Master/Sub Accounts (including the removal of Sub Accounts inheriting the Credit Limit from the Master Account) and allow you to link a single account number to an individual, with multiple sub accounts for various purchase reasons.
Create the Master Account for the customer.
Then create additional Sub Accounts that need to be linked to the Master Account.
Each sub account should be the different reasons for the sale, allowing the Customer to choose which reason is required for each sale.
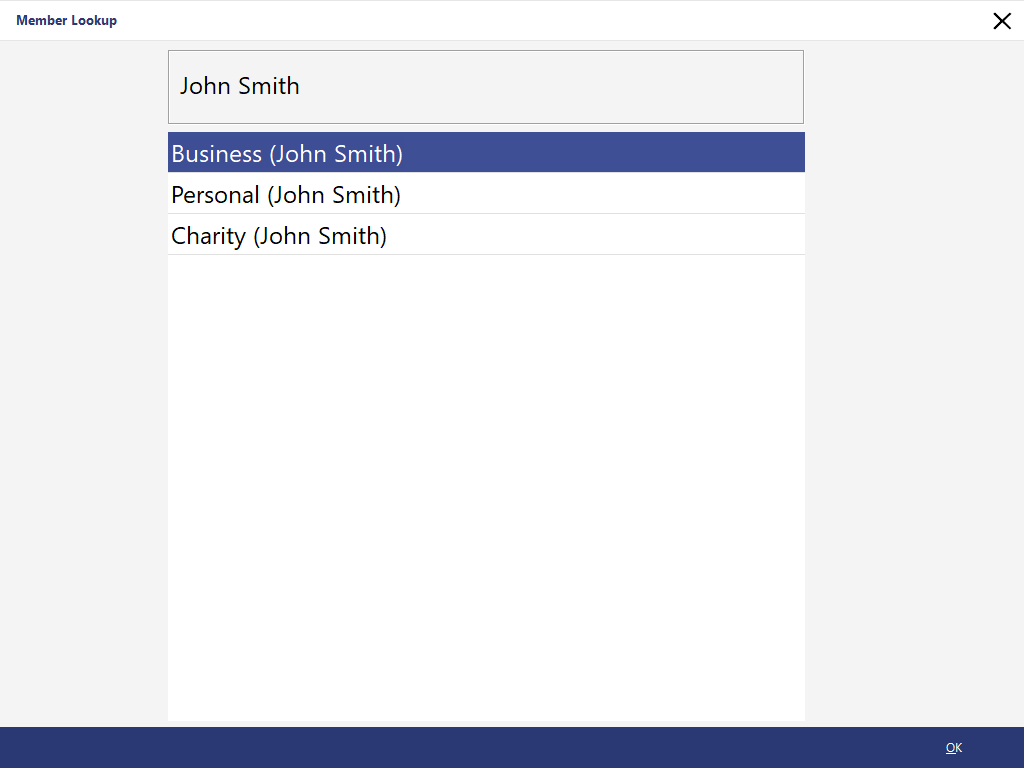
When adding a Master Account Customer to a sale, Idealpos will display a list of Sub-Accounts using the name format of First Name/Last Name.
If you want your system to behave in a similar fashion to the below screenshot example, ensure that you enter the reason into the Given Name/First Name field and the Customer's Name surrounded in brackets in the Last Name field when creating your Sub-Accounts and linking them back to the Master Account.
When adding the Master Account Customer to a sale via the POS Screen, Idealpos will display a list of Sub-Accounts for you to select.
Once the required account has been selected, press the "OK" button on the bottom-right corner of the window.
Finalise the sale as normal.